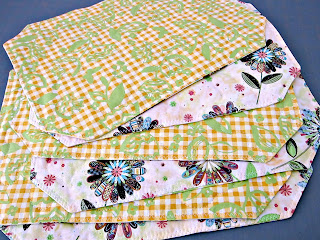
Quick and easy placemats seem like the perfect gift, and they're ready in no time, because there's no borders or binding.
Now, I don't know if this is the "right" way of making these-- it's just the way I do them. But they're perfect for a last minute gift!
For each placemat you want to make, cut 2 pieces of fabric 12 x 16".
Also cut a piece of batting slightly larger than your fabric (no need to measure the batting, just eyeball it).
I'm making a set of 6 placemats, so I cut 6 of each fabric for a total of 12 pieces, plus 6 pieces of batting.
.

Lay a piece of batting down, and put your 2 fabrics RIGHT SIDES TOGETHER on top of the batting.
Put in a few safety pins to hold everything together
Fit the 45 degree angle of your ruler into each corner of the placemat sandwich. . .
. . . and slice it off!
Using a walking foot, stitch 1/4" from the edge of the placemat sandwich.
I started sewing at the straight pin on the right, sewed all the way around, and stopped sewing when I got to the straight pin on the left.
Trim the excess batting so that it's even with the fabric, and remove all pins.

Using the hole that we left in the previous step, turn your placemats right side out.
Use a chopstick to poke out your corners if needed.
Iron, folding the unsewn edge part under neatly.
Put in a few safety pins to hold everything.
Zig zag stitch around the outer edge of your placemat.
You can now finish the quilting any way you wish.
I quilted mine with a casual stipple stitch, which was really fast-- I finished quilting all 6 placemats in about 15 minutes!


No comments:
Post a Comment