
--of sorts
Waaaaaay back in 2010, when I first started Seriously Quilting, and blogging about it, I began an absolutely EPIC project:
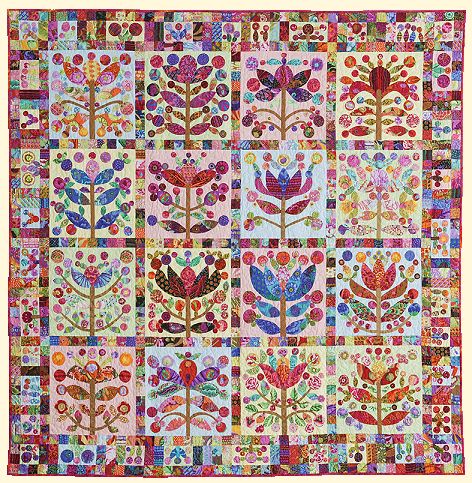 |
| photo courtesy of Glorious Color |
The awesome Lollypop Trees pattern by Kim MacLean. It was an exciting project for me, since I was teaching myself machine applique and had yet to learn or even attempt free-motion quilting. Plus it's an absolute stunner of a quilt. I even became a contributor to a blog devoted to Kim's designs (click here to go to the blog and see some fabulous eye candy of this quilt and some of her other designs).
But there's always SOMETHING that can be an obstacle when attempting a project like this, and of course it was TIME. You won't be surprised to learn that this is an incredibly time consuming project. At the time that I started it I was also a new Etsy store owner and had no idea how much time it would take to build up, and then maintain, even a modestly successful crafting business. I quickly learned it takes a lot of time and if you want to have a successful business (even on a small scale) building that business needs to take priority. Personal sewing definitely had to take a back seat. Plus, there was Life as well: I was married, my son was a young teen, work, orchestra work, maintaining a rather large home, all of that.
So I made 6 blocks, loved every minute of their construction (blogged about the process here), and put them away. Always wanted to do more with them. When I had the time.
Fast forward to maybe 2 weeks ago. Saw the blocks hanging in the closet of my sewing room. I had of course moved them to this new house 2 years ago with the rest of my sewing gear, but while freshly divorced their exuberant design didn't suit a season of mourning. So they sat for a little while longer.
Then suddenly it was time. It didn't take long.

I knew I had a perfect spot for a wall hanging, so I purposefully left off any sashing or borders that would have made the quilt wider.

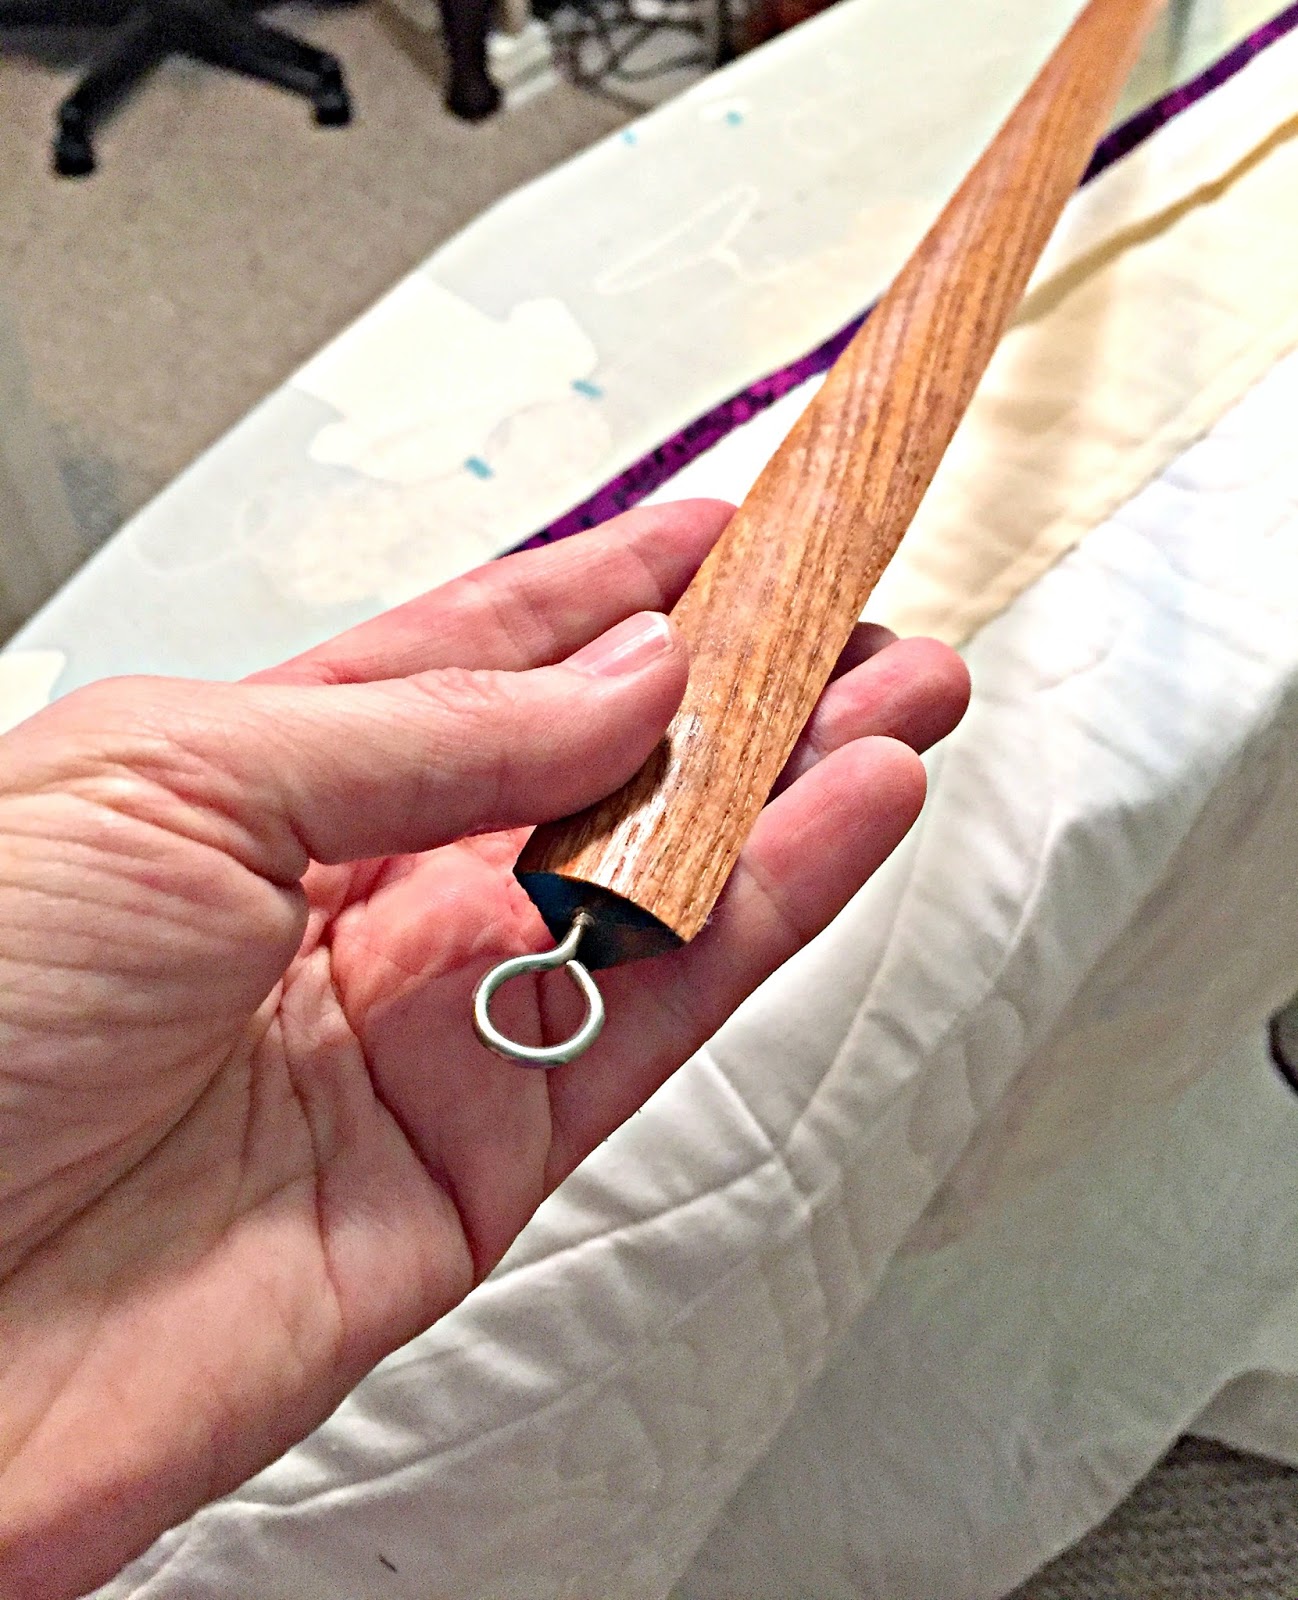
To hang the quilt I used this tutorial which I found on Pinterest. The author links the method to the one used at the San Jose Quilt and Textile Museum.
I sewed a fabric cylinder to the back of the quilt, then used a piece of quarter round and two
eye screws, plus 2 screws to go into the wall. It was literally less than $2.00 of supplies.
A few quilting details:

I don't like how free motion quilting looks on top of fused applique, so I used the walking foot on my sewing machine to do some straight line quilting on top of the applique pieces.
I have since learned to "window" my applique, which eliminates stiffness and lends itself better to free motion quilting.
I've also learned how to free motion quilt, which I did around the shapes in an echo pattern.
 The quilting is easier to see from the back.
I have lots of white muslin at home so that's what I used for the backing. And since there's no outer border that purple binding adds a nice pop of color.


I don't like how free motion quilting looks on top of fused applique, so I used the walking foot on my sewing machine to do some straight line quilting on top of the applique pieces.
I have since learned to "window" my applique, which eliminates stiffness and lends itself better to free motion quilting.
I've also learned how to free motion quilt, which I did around the shapes in an echo pattern.

I have lots of white muslin at home so that's what I used for the backing. And since there's no outer border that purple binding adds a nice pop of color.

What a beautiful wall hanging that made!
ReplyDelete